vatSys basics
This page will get you connected and understand the basics of vatSys, all with reference to our NAT profile.
Selecting a profile
If it is your first time using vatSys it should open a page looking like this:
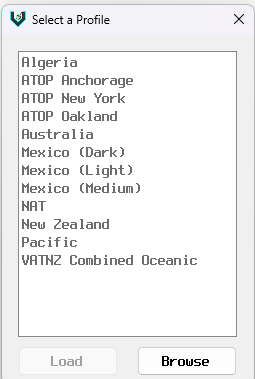
Simply double click on the NAT profile.
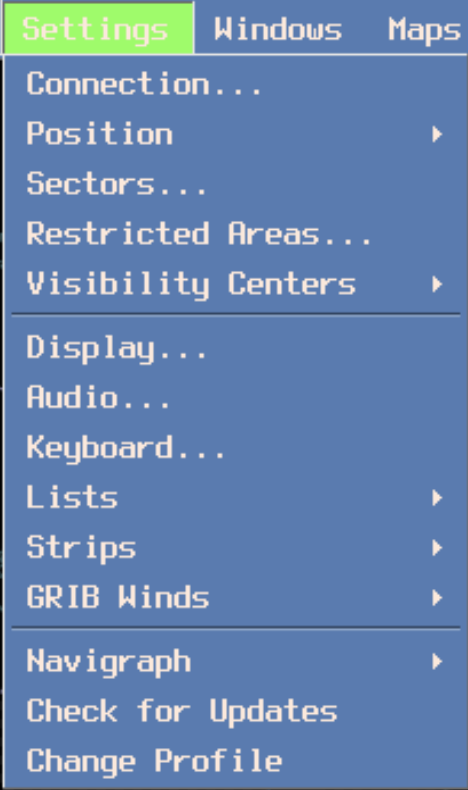
If a profile (e.g. Australia) has loaded up, to change profile, simply click
Settings > Change profile
to bring up the profile selection menu:
Selecting your Position
Your position selection sets your sectors and vis points for you ready to connect. To select a profile simply click,
Settings > Position > Position
then choose the position you wish to control.
Note: if you change this while controlling it will only move your camera/home view.
Connection Window
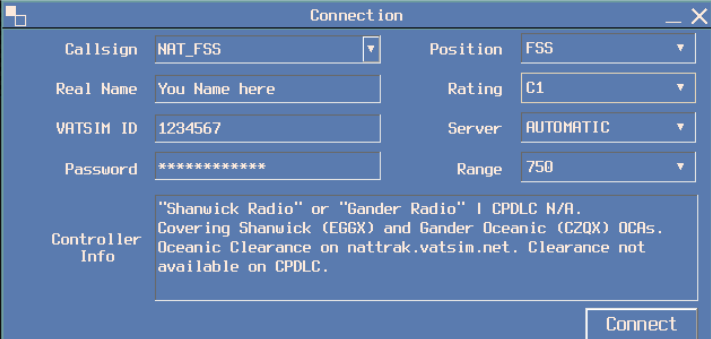
Callsign will auto-fill, based on your selected position, however a drop down of callsigns will appear. IMPORTANT, not all callsigns that may appear here are allowed to be controlled by CZQO rated controllers.
Range is set automatically and it is strongly encouraged you do not change it. This as well is based on the position you chose.
Controller info is set as you’re expected to control with. You’re more than welcome to add to it, however avoid removing critical info.
NOTE: At the time of writing CPDLC is not available on vatSys and is therefore N/A. If you decide to use an external CPDLC client you’re welcome to add the correct CPDLC logon code into your controller info.
VSCS Window
Who on earth wants to have to open an extra client just for audio??
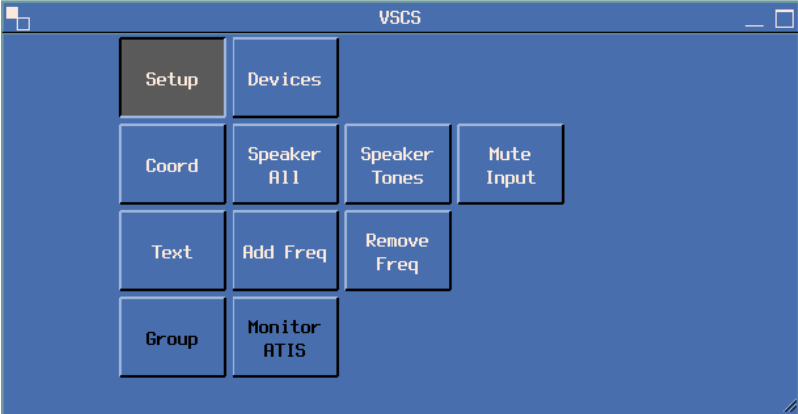
The VSCS window covers all your audio, coordination, and frequency needs.
Setup Tab
This is where you can add freqs, mute your co-ord (mute input), send audio to speakers (if you have them set up and need to dash away for any reason) and open your audio settings.
NOTE: your freq becomes “primed” when you receive on it. Primed freq will appear top left of the main window. This is the only freq pilots will see you on.
NOTE: push to talk by default is left shift and can be adjusted in
Settings > Keyboard.
If you wish to listen to another freq, you may add it on this page, you simply need to know the freq's call sign. In the event you want to transmit on a second freq, ensure the "Group" button is pushed in to ensure the frequencies are coupled and pilots can hear both freqs.
Coord Tab
Where voice communication can occur.
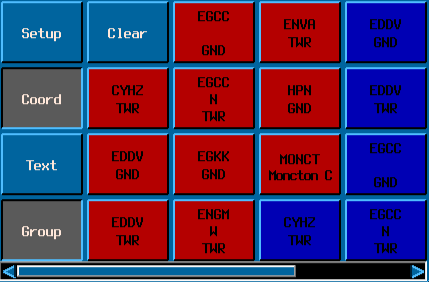
Red Boxes are hotlines, and Blue boxes are cold lines. If the text is black, the station is NOT using vatSys/mumble services. If the text is white, they ARE and can be coordinated.
Hotlines open an active voice line to the station without needing them to accept.
Coldlines require the receiving controller to accept the call.
Text Tab
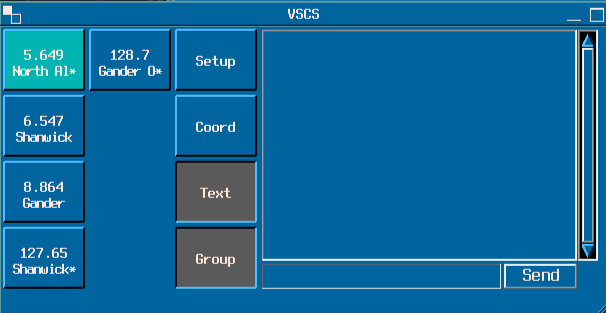
The location for your Frequency Text chat, this is where you can see the full history and send messages to your frequency's text channel.
Note: when you receive a message a window will appear, if words like Request, are used, you can reply by clicking on the green background text.
Any messages sent in the Text Tab are undirected messages and will appear as a general broadcast message. If you wish to send a direct message on freq, use the FREETEXT function on the CPDLC panel (not ACARS).
Camera Controls
All keybinds are rebindable Settings > Keyboard
Arrow Keys control your position, Middle mouse drag can be used to “peek”.
Zoom is page up and page down
Insert can be used to save a camera position, Delete to return to it.
Home returns you to the default camera position.
Messages
To open a direct message, go up to Messages > Send > and either select a callsign, observers and controllers, or type in a callsign in the text box.
All previous messages will appear under send, you can middle mouse click them to hide them and remove the local history of them.
Tags/Labels
What is that beeping noise?
There are a few noises as warnings on tags.
All of them are mutable through middle clicking the text of the warning on the tag. Locate the tag with Yellow text on the top right corner stating either CLAM, RAM, SAR, STCA. Middle Mouse click on the text to mute.
Please contact me on…
To send a contact me one must first have the aircraft selected, denoted by the strip being highlighted and/or the radar return encircled in the selection octagon.

Then simply press the F6 key on your keyboard (changeable in keyboard settings) and select the correct freq (usually only one available unless coupling multiple).
Handoff tags
There are multiple ways to hand off,
-
the quickest would be to select the aircraft (as mentioned above) then press the
numpad plus keyto open the hand-off window. -
Alternate methods to bring this window up include clicking the controlling sector on the strip. Or opening the control menu by clicking on the destination (on the strip) or callsign (on the tag) then clicking handoff.
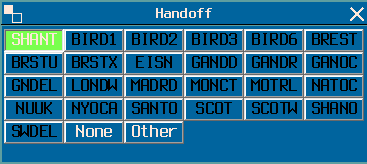
Once on the handoff menu, the suggested sector will be highlighted and once you’ve confirmed that is the correct sector you can either click it or press enter on the keyboard. Else you can select a different controller.
Info Maps
There are multiple maps you can toggle in the maps menu up top. As shown below the active ones automatically appear and are selected in black.
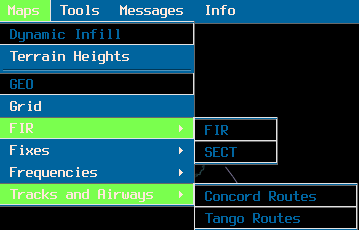
Chop and change these to your heart's content!